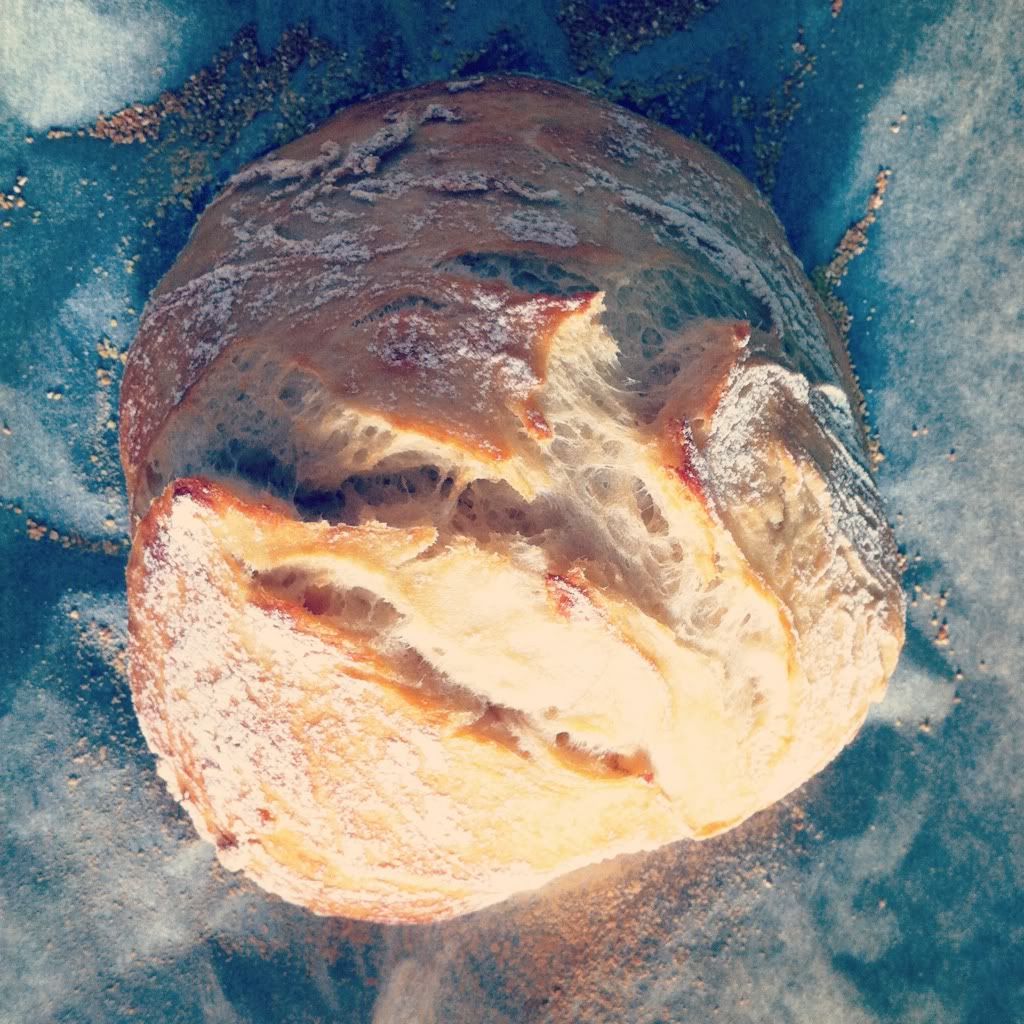
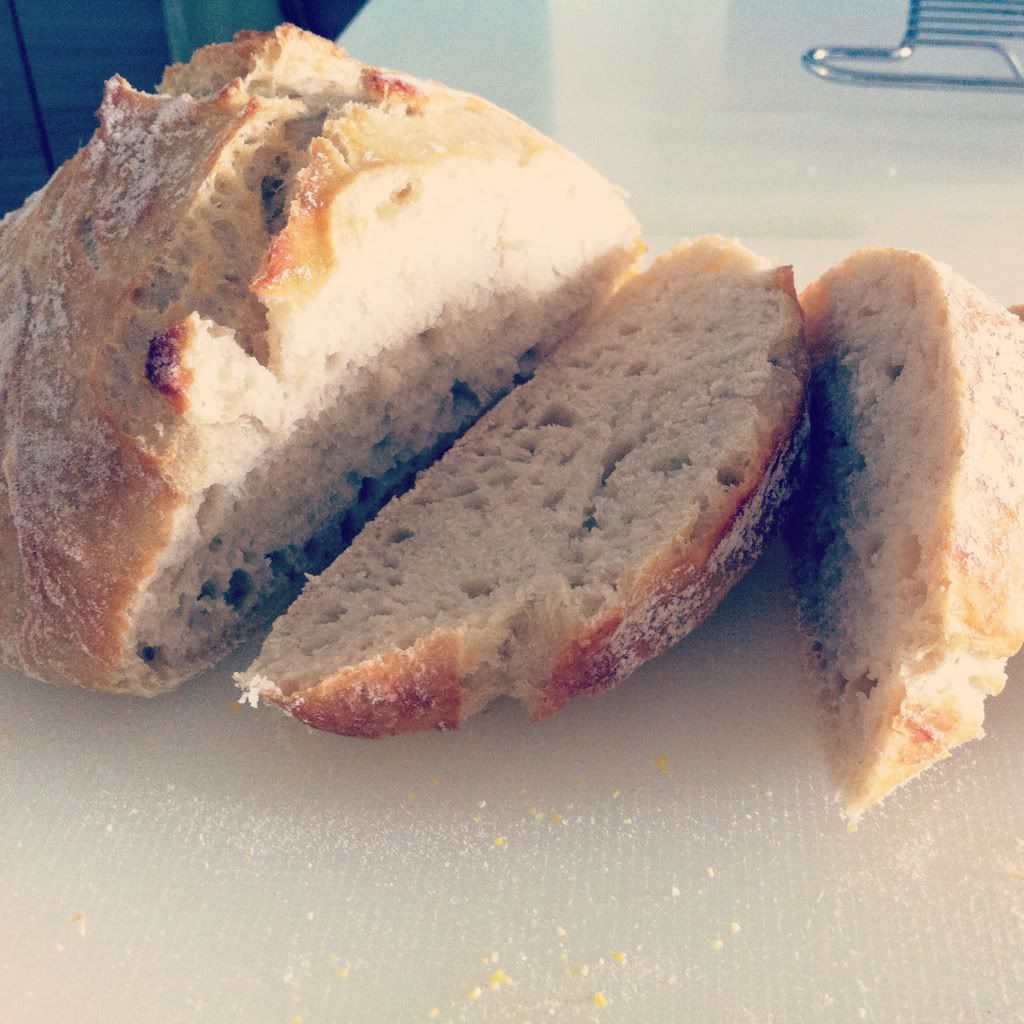
The bread gods were kind to me this morning after my sourdough disaster last week and rewarded me with my best loaf EVER. It was crisp on the outside and soft and chewy inside. We sliced into it and had it with bacon, Brie, soft boiled eggs (not all in the same mouthful!) and washed it down with super cold fresh OJ. Bliss!
I've been making this no knead bread for about six months now and it is the best thing to have happened to our breakfasts. And lunches. And dinners. And G would firmly agree. As bread is generally of a low quality in Kota Kinabalu, this no frills, four ingredient, honestly super easy recipe is a life saver. I just prepare the dough the afternoon before (takes 5 minutes) and the next morning, I give it a little gentle stretch to wake it up, tip it out onto a baking tray and 20 minutes later the apartment smells like a bakery and I have this darling hot crusty loaf sitting in front of me, begging to be eaten with butter and honey? A generous slice of cheddar? Dunked into a creamy cauliflower soup? This bread is a friend to all!
No Knead Artisan Bread (adapted from Tasty Kitchen)
Prep Time 12 Hours
Cook Time 15 Minutes
Difficulty Easy
I halved the original recipe as I found it makes the perfect sized mini loaf to feed G and I for the day. And since the bread is not half as good the next day, you'd generally want to finish it up on the day you bake it. But trust me, that will not be a problem!
Ingredients
1 1/2 cups All-purpose Or Bread Flour, With A Little Extra For Dusting
1/8 teaspoons Instant Yeast
3/4 teaspoon Salt (Note: I Started Out Using Plain Ole Table Salt But Find You Get A Much More Robust Flavor With Kosher Or Sea Salt)
215ml Water, Room temp
Preparation Instructions
In a large bowl, mix flour, yeast and salt together. Add water and stir till more or less blended. The dough will be thick and shaggy. Think Creature from the Black Lagoon.
Cover bowl tightly with plastic wrap. Let dough rest at room temperature for at least 12 hours, but to 18 or 20 hours. Seriously.
The dough is ready when it is swollen and bubbly all over the top. Think lunar surface.
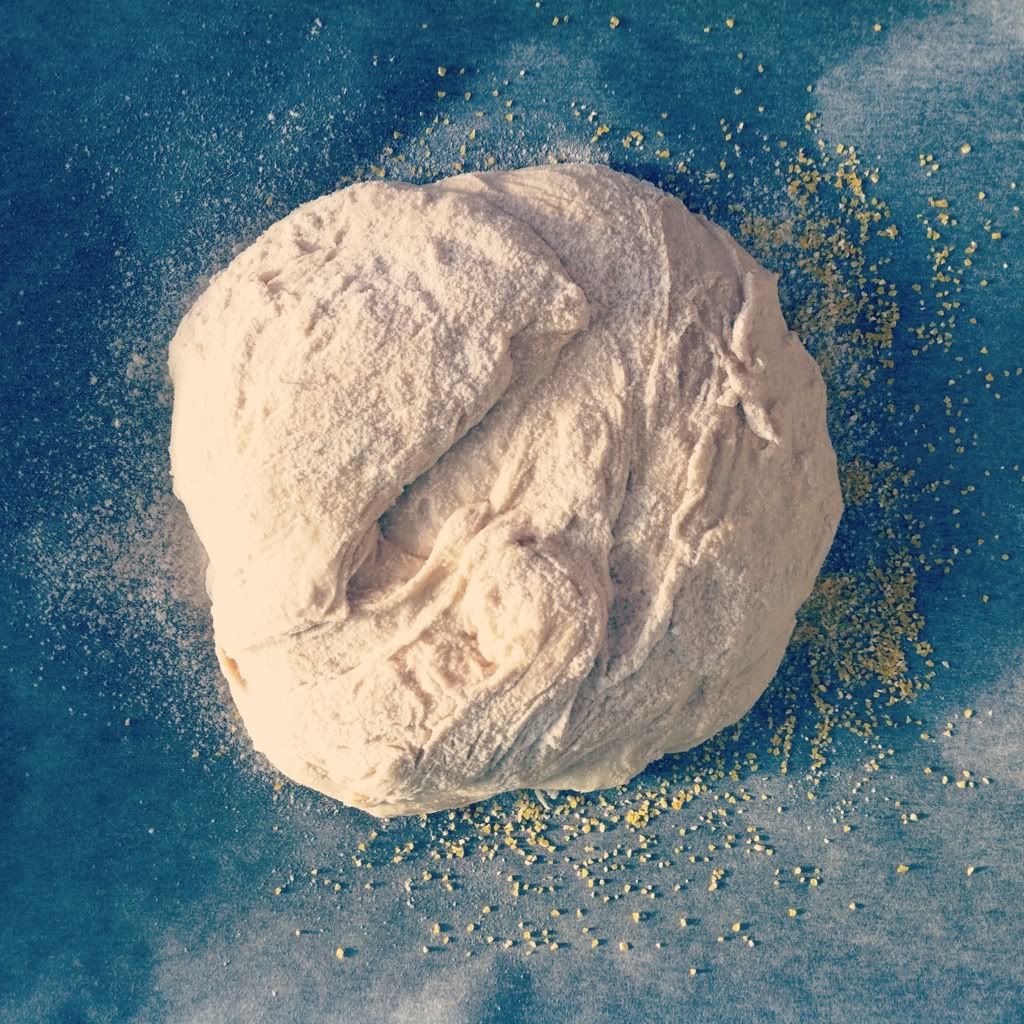
Keeping everything in the bowl, sprinkle 1/4 cup of additional flour on top of the dough. Using a floured spatula, lift up one side of the dough, give it a good stretch skyward and fold it over the rest of dough. Repeat this process 2-3 times trying not to deflate the dough too much.
Line a baking tray with baking paper or a Silpat and sprinkle some cornmeal over it (this is optional, I just like the extra texture it gives to the bottom of the bread) and tip the dough out onto the tray. As the dough is quite wet, I find it hard to score lines into it so what I do is try to plop the bread down with the edges of the dough facing up. Like in first picture I posted above. The natural joining lines of the dough make a nice score which allows the crust to crack open as it cooks and the bread to swell nicely in the oven. Dust the loaf with flour and cover with plastic wrap.
Let rise for 30 minutes while you pre-heat your oven to 475 degrees (F). The oven does need to be good and hot.
A few minutes before it’s time to put the bread in the oven, put a pie pan (or any oven safe container) filled with 1/2 – 1 inches of water on the bottom rack. This creates steam — a “turbo boost” for the bread and creates a great crust.
Bake bread on middle rack till it’s a fine, nutty brown — about 15 minutes for rolls and about 20 minutes for loaves. Bottoms of your bread should be browned as well.
Cool on a rack, and as tempting as it may be to tear into your bread while warm, it’s actually way better once it cools. You have been warned.
No comments:
Post a Comment